I bought a 2003 S10 with a 2.2L engine in it on Ebay. The truck had 122,000 miles on it, and a blown head gasket. The simple fix turned not so simple.
We pulled the engine out of the truck, had the head milled 0.010", and installed new rod and main bearings. We put the engine back in the truck,
only to find that had low oil pressure. Started reading online, and found out that these 2.2L engines are hard on cam bearings. Of course, we didn't
replace the cam bearings.
So, we drove it this way for 9000 miles, with Mobil 1 10W40 High Mileage to keep oil pressure, then a rod started knocking. So, we removed the engine again, rebuilt it again, this time with cam bearings.
It is also worth noting that these engines from 98 - 03 have really short piston skirts, and will clatter like a diesel when cold if not perfectly fit to the cylinder diameter.
Contrary to Chilton's, and GM, these engines have a knock sensor, and the clattering pistons
will retard the timing, and make your performance and gas mileage poor.
Removal
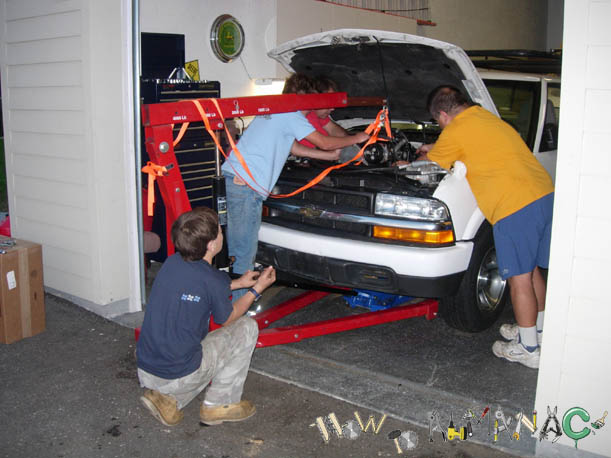
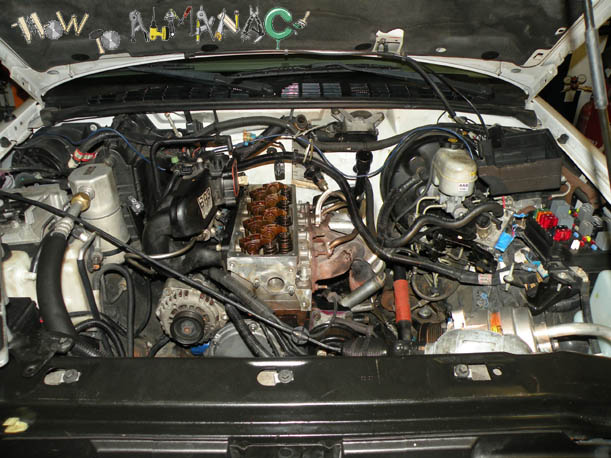
Removing the Engine - We removed the head, with the intake and exhaust manifold, before removing the engine from the truck. You can leave the A/C compressor and Power steering pump connected and off to the side.
|
I bought the new pistons from Rock Auto

|
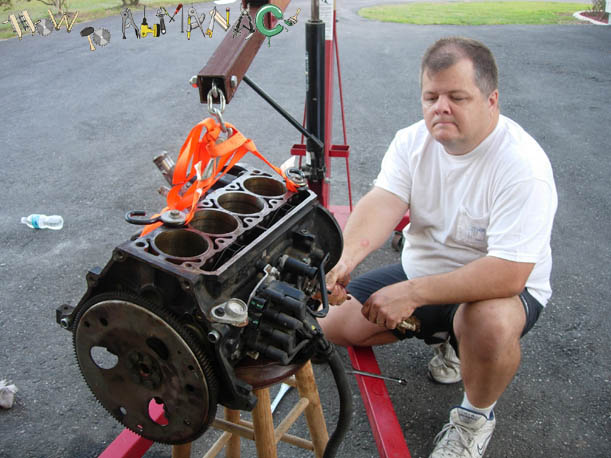
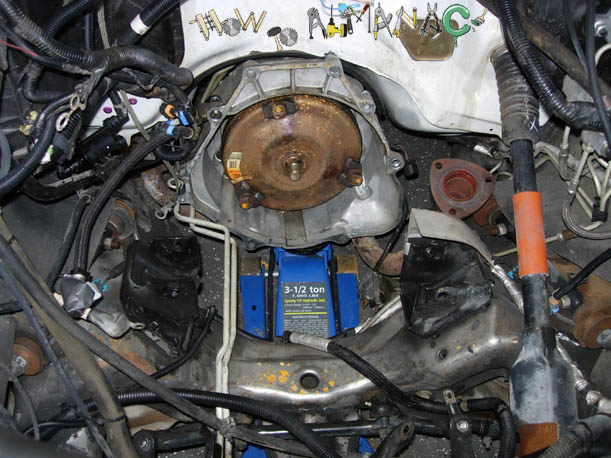
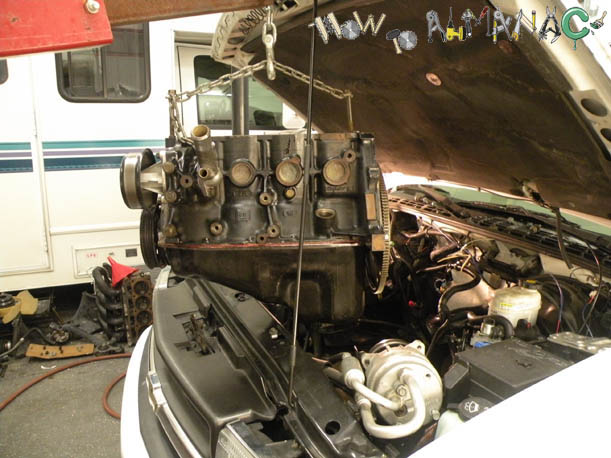
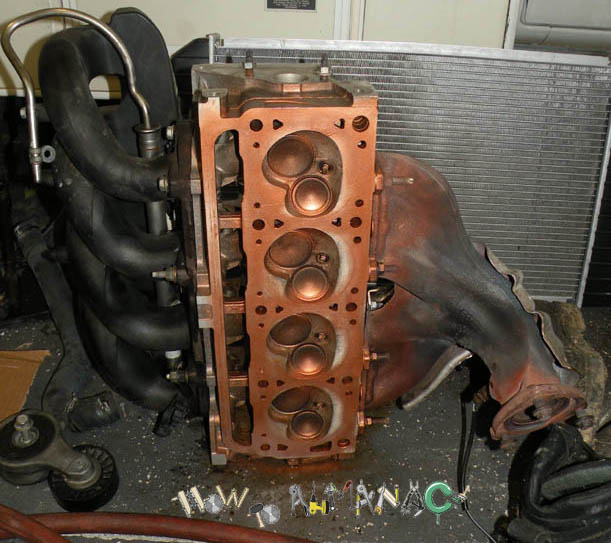
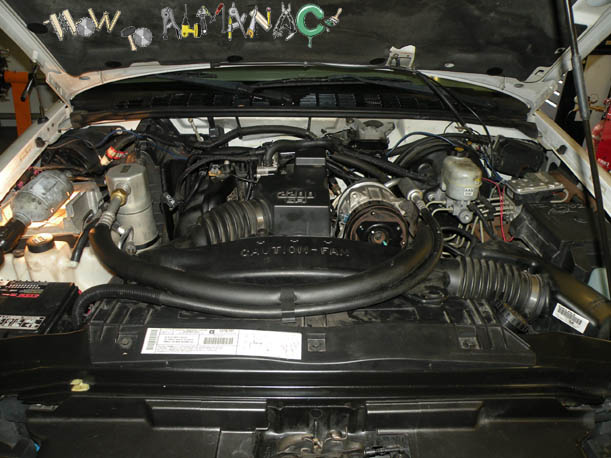
Engine Removed - Inspecting engine before mounting on engine stand.
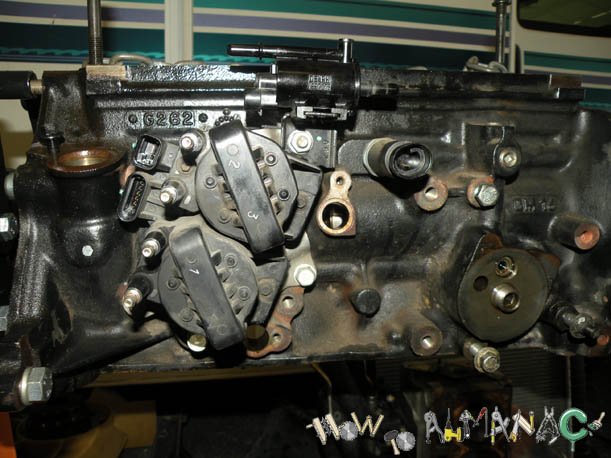
Engine Removed - Passenger Side of Engine.
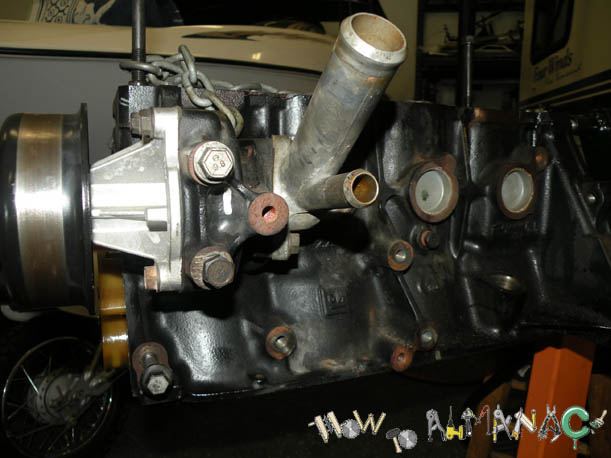
Engine Removed - Driver Side of Engine. Water pump and water inlet are aluminum, and will have to be removed if your machine shop is going to hot tank the engine.
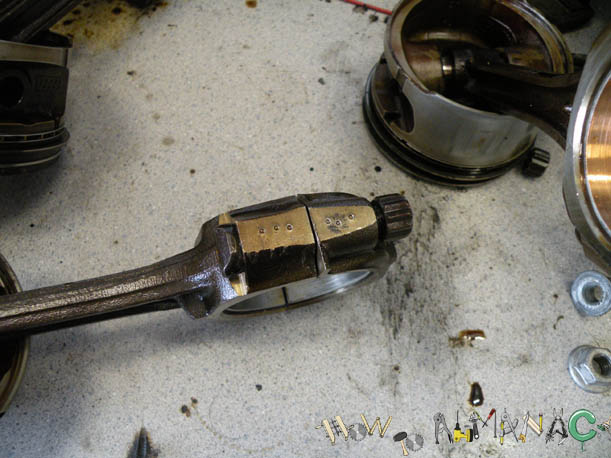
Engine Parts Removal - Before removing each rod, use a center punch to mark each rod, and rod cap. The front rod get ones punch, the second gets two punches, etc...
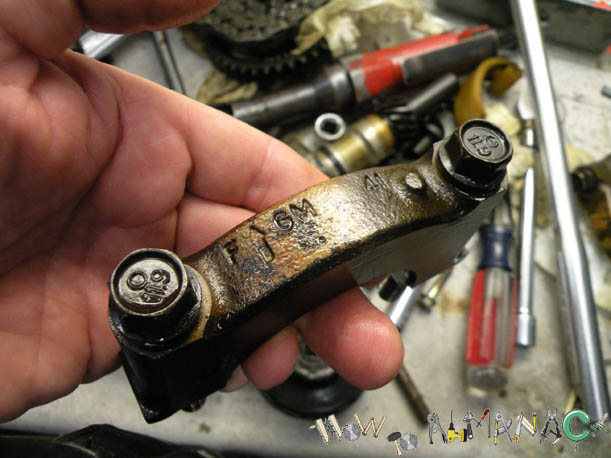
Engine Parts Removal - Before removing each main bearing cap, use a center punch to mark each one. The front bearing cap gets one punch, the next/second cap get two punch marks, etc...
Engine Parts Removal - Remove the cam shaft sprocket, then the timing chain. Make sure you have the hole drilled in the oil gallery freeze plug. Early models didn't have this, and caused the chain tensioner to go out early.
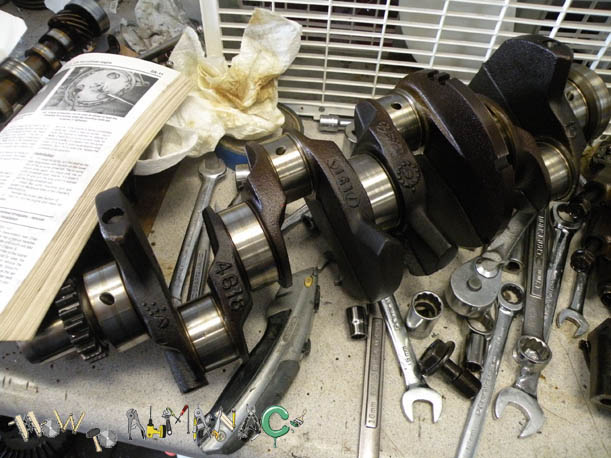
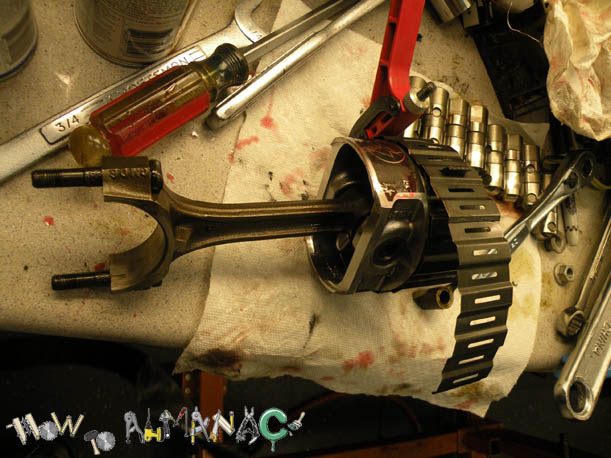
Engine Parts Removal - Remove the Crankshaft. The crankshaft was worn 0.004", so all surfaces will need to be turned down to 0.010" under stock.
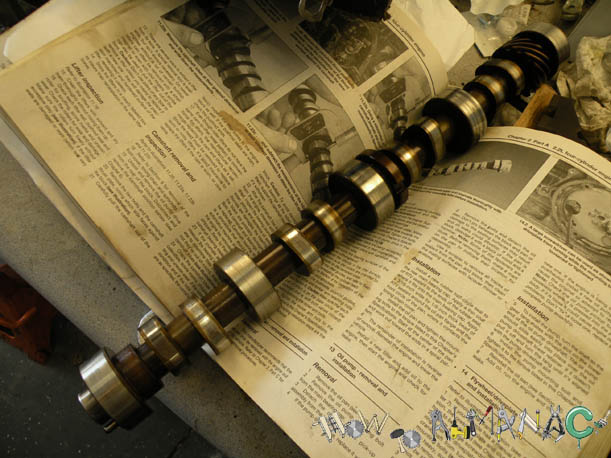
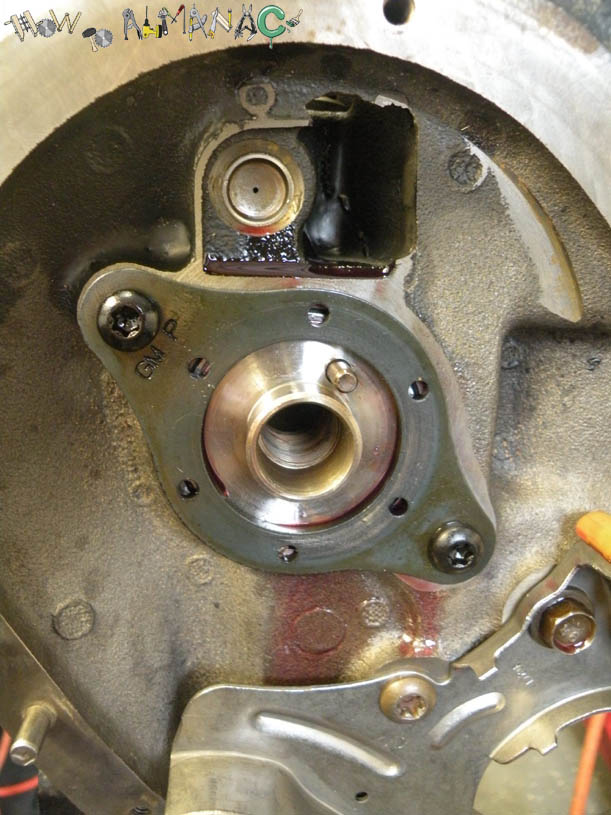
Engine Parts Removal - Remove the cam position Sensor from the Passenger Side of the motor, and remove the aluminum Distributor oil pump drive plug on the passenger side as well. The cam was only worn 0.0005", so it is ok to use.
They do make 0.001" under cam bearings if needed.
Prep
Prep - Pressure wash the engine compartment, and replace the front seal on the transmission if it looks like it make be leaking. Now is the time!
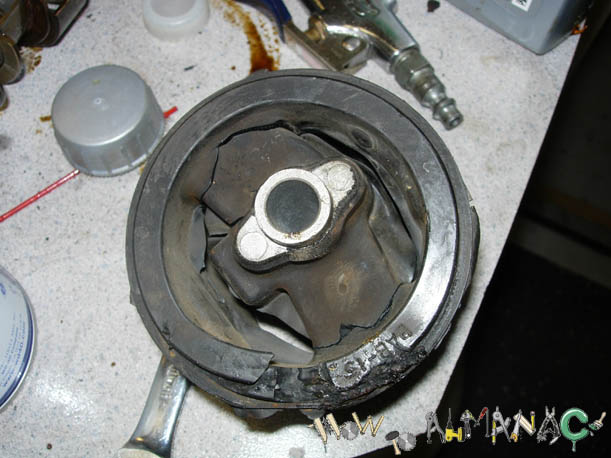
Prep - Replace any broken parts. Both motor mounts were broken. I'm sure towing a trailer with a 2-5/16" ball had nothing to do with this.
|
I bought the motor mounts from Rock Auto
|
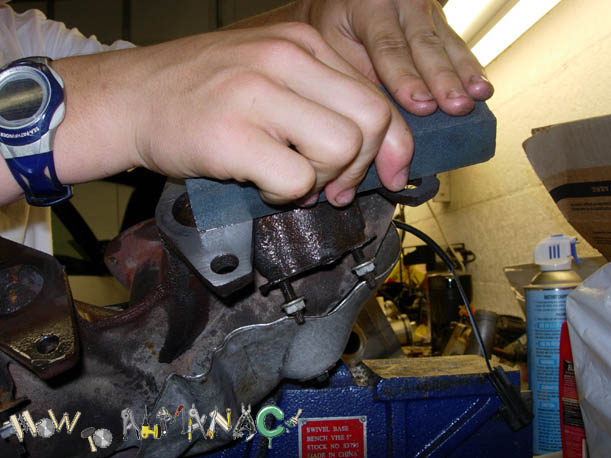
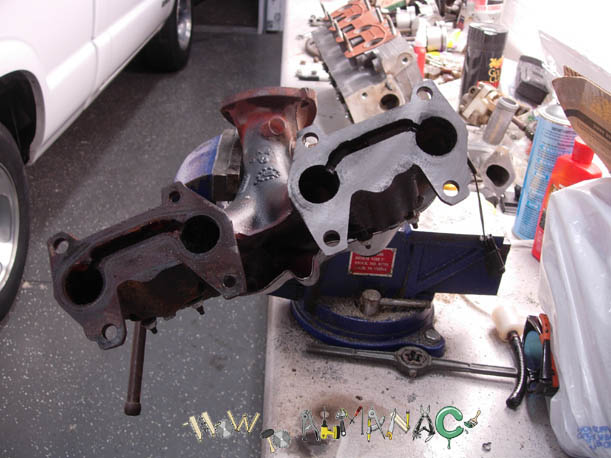
Prep - Block surface the exhaust manifold. We used a sharpening stone.
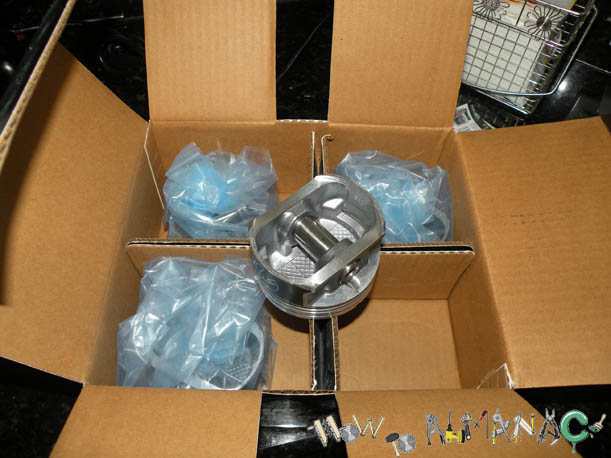
Prep - New Parts.
I ordered new 0.020" over pistons and rings, and took them to the machine shop with the block, so they could bore the block out to match each piston. The machine shop also changed the pistons on the rod for me, since they are press fit on the wrist pins.
The pistons also have a low friction material on the skirts with Sealed Power'd logo embedded in it.
I took the crank to a machine shop and had it turned down 0.01", and ordered .010" under main bearings, and rod bearings.
I ordered a new oil pump. They no longer make High Volume oil pumps for this engine. I sure wish I could have found one.
I ordered new lifters. One of the old lifters was pumping to much oil up the push rod.
|
I bought the pistons, rings, bearings and oil pump from Rock Auto
|
Prep - Block and crank back from machine shop. Main bearings installed in block.
Assemble
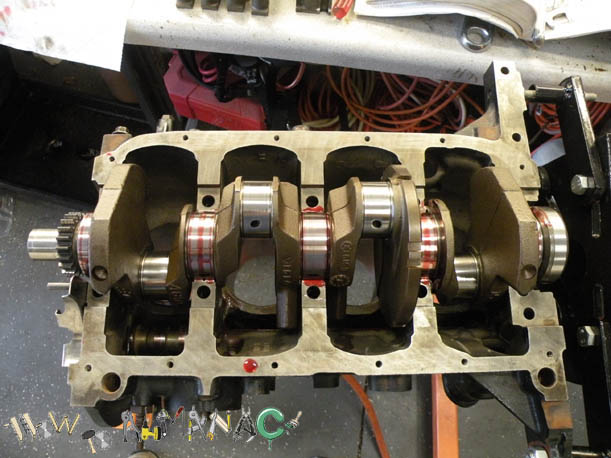
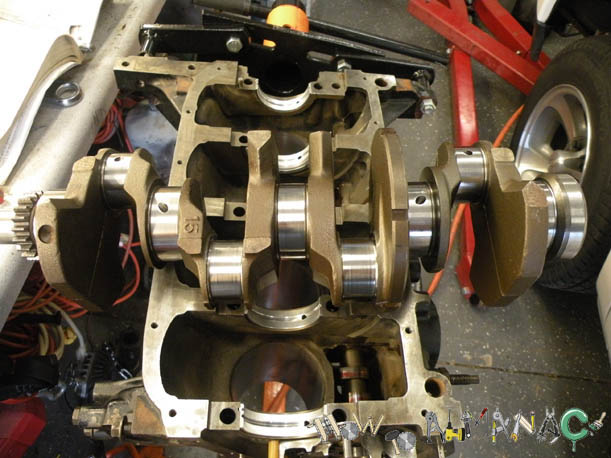
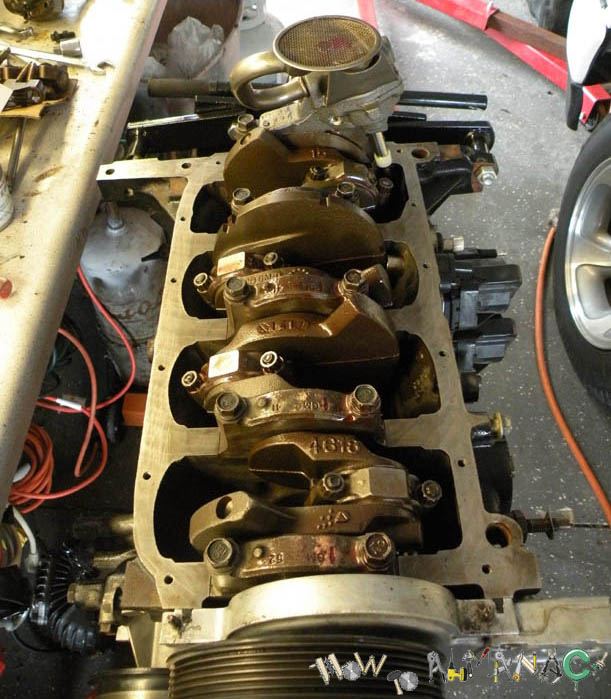
Assemble - Crank laying in block with assembly oil in and on it.
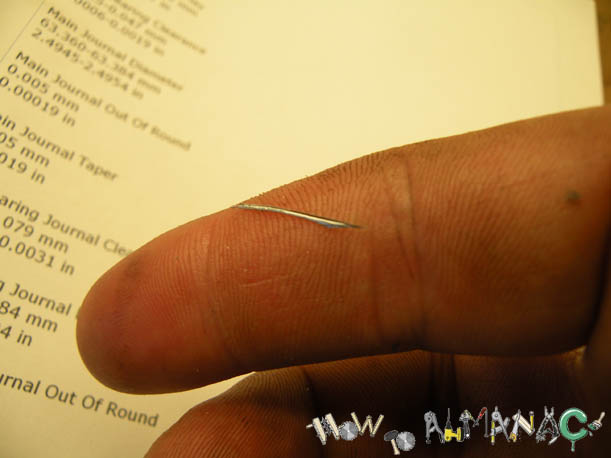
Assemble - Check each bearing before installing. I found this sliver in one of the bearings. This could have done a lot of damage!
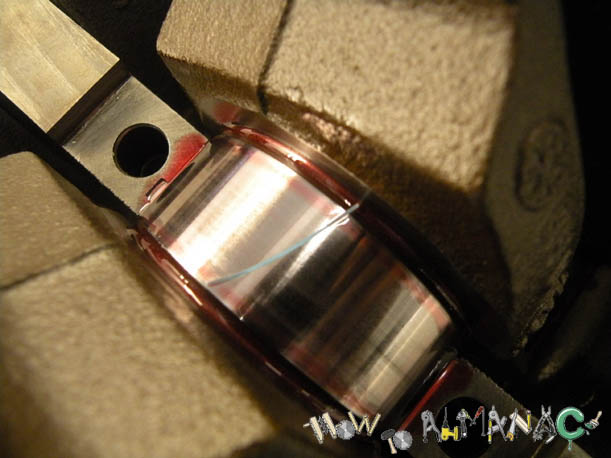
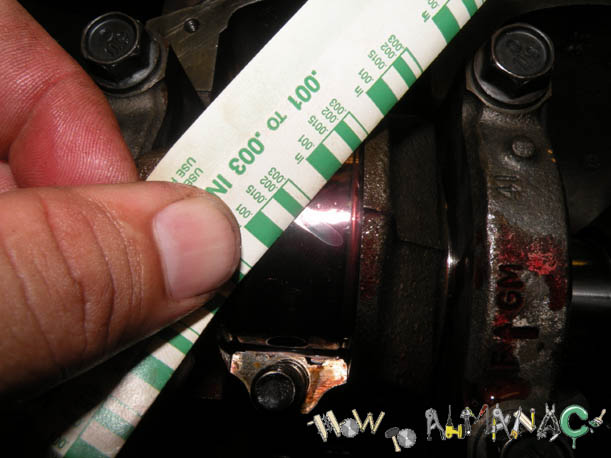
Assemble - Use Plastigage on each main bearing to check clearance.
Assemble - Clearance should be 0.0015" to 0.002". We're at about 0.0018. REPEAT FOR EACH MAIN BEARING!!!
Assemble - Check ring gap in cylinders.
|
I bought the pistons, rings, bearings and oil pump from Rock Auto
|
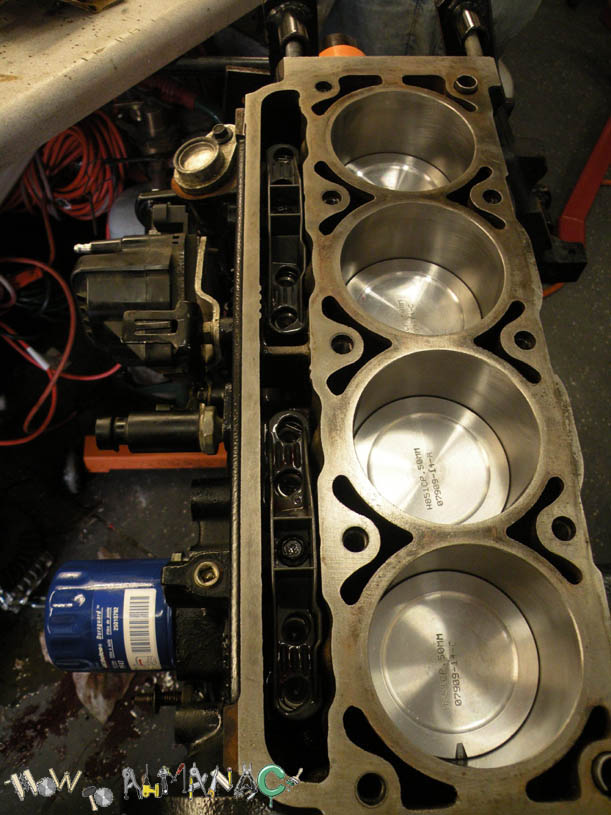
Assemble - Install the rings on the pistons. Install ring compressor on piston, then install each piston being careful not to hit crankshaft journals with the rod studs. Make sure to stagger the cuts in the rings around the piston.
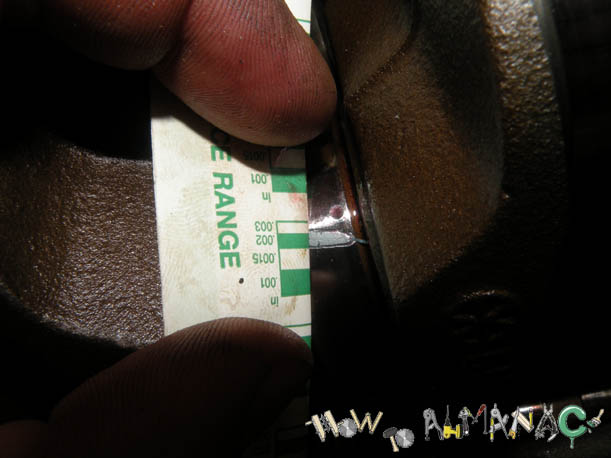
Assemble - Use Plastigage again to check the rod bearing clearance of each rod. The rod bearings were all 0.0015" to 0.0018". The machine shop did a good job.
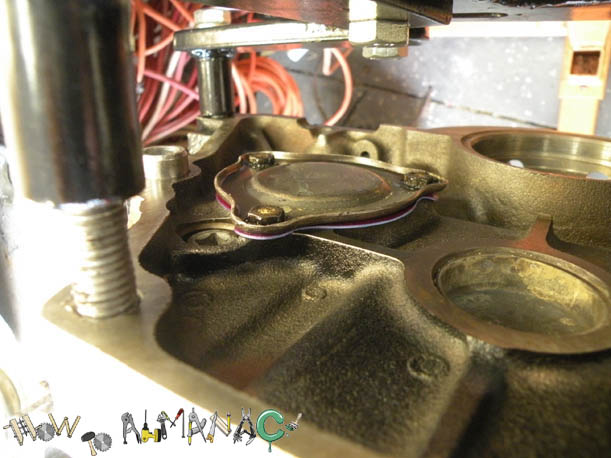
Assemble - Install the rear cam cover. Be sure to use Black RTV on the bolt threads, since the bolts go to the inside of the engine. Next, install the cam using plenty of assembly oil.
|
I bought the Gasket Kit from Rock Auto
|

Assemble - Install the cam sprocket, timing chain, and timing chain cover. Make sure the dot on the crankshaft gear is pointing towards the center of the Camshaft gear bolt. Make sure the hole in the Camshaft gear is pointing towards the center of the crankshaft.
Be sure to remove the nail holding the chain tensioner back, before installing the timing cover.
|
I bought the timing chain and sprockets from Rock Auto
|
Assemble - Install the oil pickup tube and screen on the new oil pump, then install oil pump.
|
I bought the oil pump from Rock Auto
|
Assemble - Install the oil pan, and rear main seal. I used red gasket adhesive to stick a fel-pro gasket to the block, then black rtv at the corners and the bearing lips of the oil pan. Make sure you install the stud in the proper location to support the transmission cooler lines. MAKE SURE THE TWO CORK TABS NEXT TO THE REAR MAIN DO NOT POP OUT, OR IT WILL LOOK AND FEEL LIKE YOU HAVE A REAR MAIN SEAL LEAK!!!!
|
I bought the Fel-Pro gaskets from Rock Auto
|
Assemble - Install the Lifters and the lifter guides. Install 2 quarts of oil. Install the oil filter. Use a 5/16" socket on the end of two extensions, insert the socket and extensions in a drill. Place tape on the junctions of the extensions and socket, so they don't fall apart.
Place the socket down in the distributor hole, and drive the oil pump. Connect a gauge to the 1/8" NPT oil pressure outlet on the passenger side of the motor. Make sure you have 65 PSI of oil pressure at a reasonable drill RPM, and that no lifters
are spraying oil up out of the engine. One the eight new lifters was leaking oil up the push rod. It was squirting two feet in the air when using the drill to test the oil system.
|
I bought the Lifters from Rock Auto
|
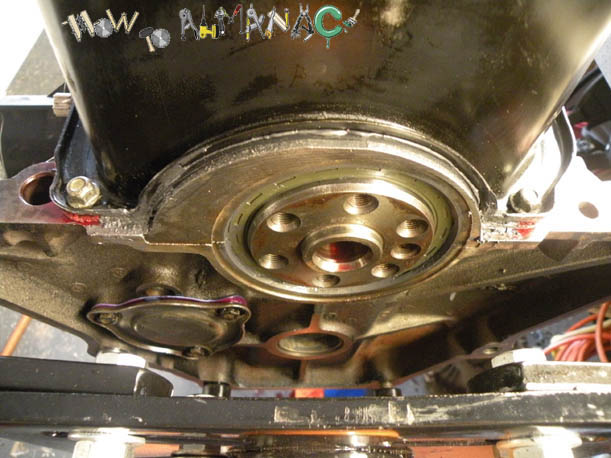
Assemble - Install the flex plate, and attach the engine to the engine hoist to install back in the truck.
Assemble - The spark plug wires have been installed, the coils have been connected, the sensors on the passenger side have all been connected, and the three ground wires on the passenger side of the bell housing have been connected.
The flex plate has been bolted to the torque converter, the inspection cover and starter have been installed, and the strengthening rods have been installed on both sides of the motor.
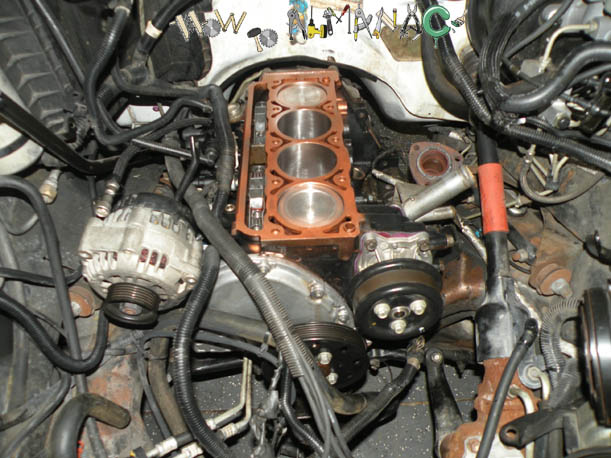
The top of the cylinders has been cleaned with carb cleaner, and copper spray gasket has been applied. BE SURE TO INSTALL THE LOWER RADIATOR HOSE ON THE ENGINE BEFORE INSTALLING THE HEAD!!!!
Assemble - The head has the head gasket area, and the front water outlet gasket cleaned. Copper spray gasket has been applied to the cylinder head gasket area.
|
I bought the Head Gasket from Rock Auto
|
Assemble - If you had the head milled down 0.01", you need to use a 0.01" shim on the motor side of the head gasket. Be sure to place a drop of motor assembly oil on each of the head bolt threads, and head washer area so that correct torque readings are achieved.
Bring the head bolts up to torque in three steps, then turn each head bolt 90 degrees more. Connect the fuel line, and evaporative canister fuel line. Bolt the transmission dip stick tube and fuel line to the intake manifold. USE NEW HEAD BOLTS!!!!
Assemble - After the head is bolted down, install the valve cover. Next, install the Fan bearing bracket or accessory bracket. After it is installed, route the positive battery cable along the front of the valve cover.
The positive battery cable goes under the front water outlet heater pipe. The spark plug wires go over it, and snap in the spark plug wire bracket. Make sure to bolt the heater tube to the valve cover.
Assemble - Install the throttle body, radiator, lower fan shroud, fan, upper fan shroud, and upper radiator hose. Next install the power steering pump, and A/C compressor. Connect the heater hoses back up.
Assemble - Install antifreeze, and fire it up. Check the antifreeze after ten minutes of running. The engine has to belch, before it makes room for more antifreeze.
Foot Notes
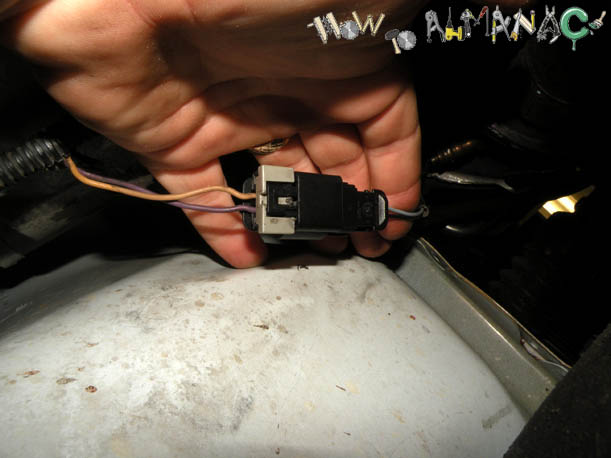
Foot Note - If you forget to unplug the oxygen sensor before removing the head, and you pull the wires out of the connector, this is how the wires are supposed to be connected.
All of the manuals only show the 03 2.2L S10 having a one wire oxygen sensor. Ours has two wires, and you can see that the colors don't match up.
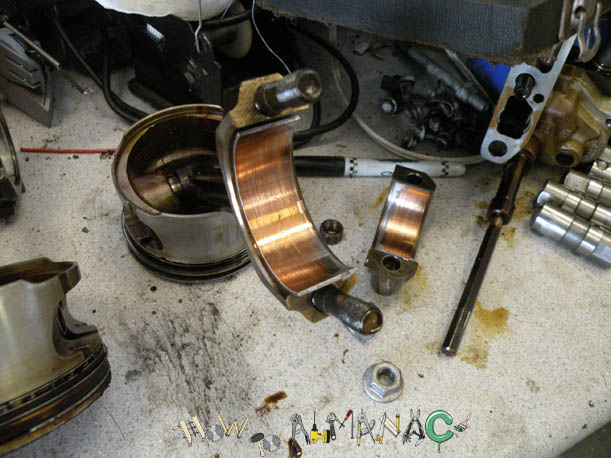
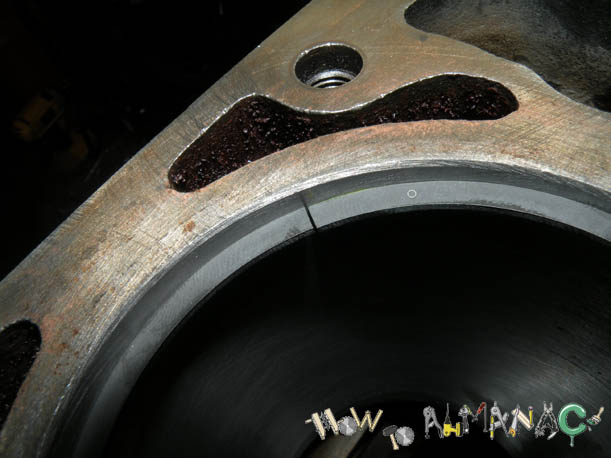
Foot Note - This is why you replace the cam/all bearings. The 2.2L feeds oil to the crank by bypassing around the cam bearings. When the cam bearings are worn and leaky, not enough oil bypasses to the crank, and starves the crank and rods for oil. COSTLY MISTAKE!!!
Final Thought - The S10 has plenty of power this time around, probably thanks to the tighter pistons providing higher compression, and no clatter retarding the timing. The oil pressure is 65 at an idle when cold, but drops to 20 at an idle after a hard run down the interstate.
It drops to about 25 at an idle driving around town when it is hot. I'm running Mobil 1 10W30.
Always replace every bearing when you rebuild an engine. If the fan bearing is worn out, you will have to get the fan bracket from a Chevy dealer.
